
 Business License
Jaw Coupling Spider Replacement: A Step-by-Step Maintenance Guide
A maintenance technician at a packaging plant in Brazil noticed vibration on a motor-pump set during his morning rounds. The motor was running, the pump was delivering flow, but the bearing housings were shaking more than usual. By lunchtime, he had isolated the problem to a cracked jaw coupling spider. Because the team had spare spiders on the shelf and knew the replacement procedure, the jaw coupling spider replacement was finished before the afternoon shift started.
Jaw couplings are one of the most common flexible couplings in industrial plants. They are simple, cost-effective, and easy to maintain. The elastomer spider absorbs vibration, compensates for minor misalignment, and protects connected equipment from shock loads. Over time, the spider wears, hardens, or cracks. Knowing how to perform a jaw coupling spider replacement quickly and correctly keeps equipment running and prevents more expensive damage to motors, pumps, and gearboxes.
This guide explains when to replace a jaw coupling spider, what tools you need, how to do the job safely, and how to choose the right replacement element. It is written for maintenance technicians, plant engineers, and buyers who need practical, reliable guidance.
Why Jaw Coupling Spiders Fail
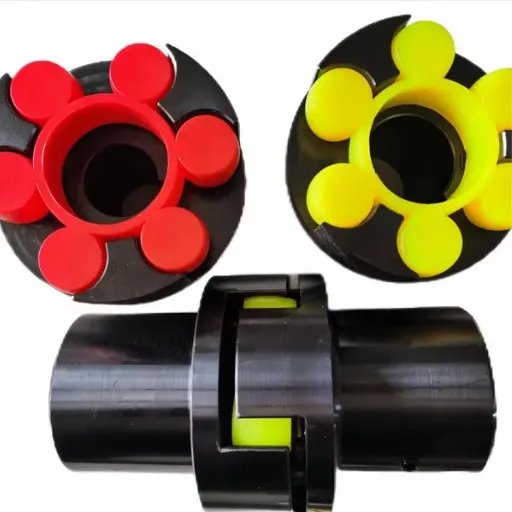
Spider failure usually happens for one of three reasons: normal wear, thermal or chemical degradation, or overload. Understanding the cause helps you select a better replacement and avoid repeat failures.
Normal wear is expected. Every time the coupling transmits torque, the elastomer spider flexes slightly. Over months or years, this repeated flexing causes the material to fatigue. Cracks appear at the roots of the spider legs, and the material loses elasticity. A worn spider still transmits torque, but it no longer absorbs vibration effectively. The increased vibration transfers to bearings and seals, shortening their life.
Thermal degradation accelerates wear. Rubber and polyurethane spiders have temperature limits. When a coupling runs hot because of high ambient temperatures, frequent starts, or poor ventilation, the elastomer hardens. A hardened spider cracks more easily and transmits more vibration. In one food-processing plant we worked with, the standard nitrile rubber spider on a heated mixing tank lasted only four months. Switching to a high-temperature polyurethane spider extended the replacement interval to 14 months.
Chemical exposure also causes problems. Oil, grease, solvents, and some process vapors attack elastomer materials. A spider that is not chemically compatible with the environment swells, softens, or loses strength. If your coupling is near lubrication leaks or chemical washdowns, check the spider material specification carefully.
Overload failures look different. Instead of gradual cracking, the spider may tear, chunk, or separate from the jaws entirely. This can happen from startup torque spikes, jammed loads, or misalignment that exceeds the coupling's capacity. If the spider fails suddenly, inspect the hubs and shafts for damage before installing a new spider.
Signs You Need a Jaw Coupling Spider Replacement
Catching a worn spider early prevents unplanned downtime. During routine inspections, look and listen for these warning signs.
Vibration increase is the most common indicator. When the spider loses elasticity, the coupling transmits more vibration from the driver to the driven machine. You may feel it on the bearing housings or see it on a vibration meter. If vibration levels rise gradually over several weeks, the spider is likely hardening or cracking.
Visible cracks or missing pieces mean the spider is already failing. Remove the coupling guard and inspect the element. Small cracks at the base of the spider legs are normal early wear. Deep cracks, torn sections, or missing chunks indicate the spider needs immediate replacement.
Unusual noise can signal a damaged spider. A healthy jaw coupling runs quietly. If you hear rattling, knocking, or squealing, the spider may be loose in the jaws, cracked, or chemically swollen.
Excessive heat around the coupling is another warning. A worn spider generates more friction as the jaws rub against damaged elastomer. If the coupling housing is hot to the touch, stop the machine and inspect the spider.
Misalignment symptoms sometimes appear as spider wear. If the spider wears unevenly, with more damage on one side, the shafts may be misaligned. Replacing the spider without correcting the alignment will only lead to another early failure.
Tools and Preparation for Spider Replacement
Before starting a jaw coupling spider replacement, gather the right tools and follow lockout/tagout procedures. Working on rotating equipment is dangerous, and a few minutes of preparation prevents accidents.
Required Tools
For most jaw couplings, you will need:
Adjustable wrench or socket set for the coupling guard bolts
Torque wrench for hub fasteners
Screwdrivers or pry bars for removing the old spider
Clean rags and degreaser for cleaning hubs
Feeler gauge or caliper for checking hub gap
Alignment tools (dial indicators or laser alignment system)
Replacement spider of the correct size and material
Manufacturer's installation manual
Safety Steps
Lock out and tag out the drive. Disconnect power to the motor and verify zero energy state. Do not rely on the off switch.
Allow the machine to cool. Couplings and housings can be hot after operation.
Remove the coupling guard. Keep guard hardware organized for reassembly.
Inspect the area. Check for oil leaks, loose fasteners, or other hazards before removing the spider.
Ordering the Right Spider
Spiders are not universal. Each jaw coupling size uses a specific spider profile. Before ordering, check:
Coupling size or model number
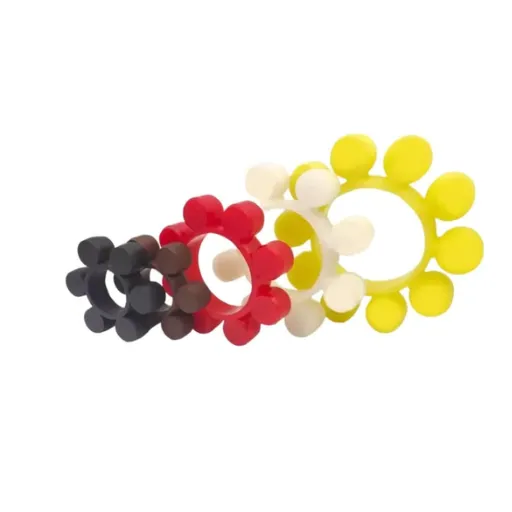
Spider material (rubber, polyurethane, Hytrel, etc.)
Number of jaws (typically three, four, or six)
Outer diameter and thickness
Operating temperature and chemical exposure
Hebei Suju supplies jaw coupling spiders in several materials to match different operating conditions. If you are unsure which material to choose, contact our team with the application details.
Step-by-Step Jaw Coupling Spider Replacement
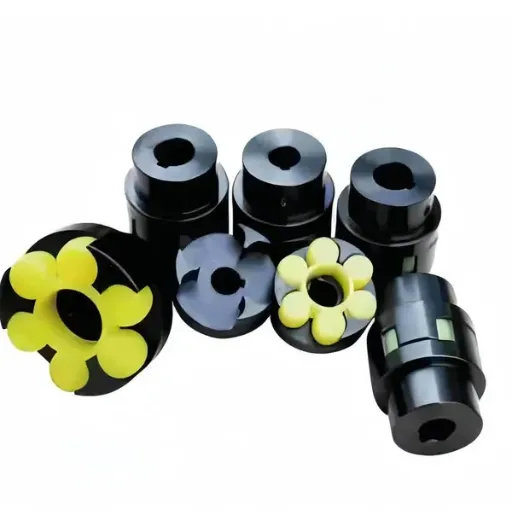
Once the machine is locked out and the guard is removed, the spider replacement itself is straightforward. The entire job can often be completed in under an hour.
Step 1: Inspect the Existing Coupling
Before removing anything, take photos of the coupling from multiple angles. Note the gap between hubs, the position of any keyways, and the condition of the spider. These photos are useful if questions arise during reassembly.
Check the hubs for wear. The jaws should be smooth, with no burrs, galling, or cracks. If the metal hubs are damaged, replacing the spider alone will not fix the problem. Worn hubs accelerate new spider wear and can cause vibration even with a fresh element.
Step 2: Remove the Old Spider
Most jaw couplings allow spider replacement without moving the motor or pump. The process is usually:
Loosen the hub fasteners on one or both hubs. Do not remove them unless necessary.
Slide one hub slightly along the shaft to create access.
Pry out the old spider using screwdrivers or pry bars. Work carefully to avoid scratching the jaw faces.
Remove all pieces of the old spider, including any fragments stuck in the jaw cavities.
If the spider is bonded to the jaws from heat or chemical exposure, you may need a thin blade or scraper to clean the surfaces. Be gentle. The goal is to remove the elastomer without damaging the metal.
Step 3: Clean the Hubs
Use a clean rag and degreaser to remove oil, dirt, and old elastomer residue from the jaw faces. Clean mating surfaces help the new spider seat properly and transmit torque evenly.
Inspect the shaft keys and keyways. If the key is loose or damaged, replace it. A loose key can cause hub slippage and uneven loading on the spider.
Step 4: Install the New Spider
Align the new spider with the jaws on one hub. Most spiders are symmetrical, but some have a preferred orientation. Check the manufacturer's drawing if available.
Press the spider into the jaws by hand. It should fit snugly without excessive force. If you have to hammer the spider into place, you may have the wrong size or the jaws may be distorted.
Once the spider is seated in one hub, align the second hub and slide it into engagement. Rotate the hubs gently to make sure the spider legs engage evenly in all jaw cavities.
Step 5: Set the Hub Gap and Tighten Fasteners
Set the axial gap between the hubs according to the manufacturer's recommendation. The gap allows for thermal expansion and axial movement. Too little gap can cause the spider to be pinched; too much gap reduces torque capacity and misalignment tolerance.
Use a torque wrench to tighten hub fasteners to the specified value. Uneven torque causes hub runout and vibration. Tighten in a star pattern if multiple bolts are present.
Step 6: Check Alignment
After reassembly, check shaft alignment. Even if the machine was aligned before, removing and reinstalling the hub can change the position. Measure angular and parallel misalignment and adjust as needed.
For a detailed alignment procedure, see our guide on measuring shaft misalignment.
Step 7: Reinstall the Guard and Test Run
Reinstall the coupling guard and remove the lockout/tagout devices. Start the machine and let it run at low speed if possible. Listen for unusual noise and feel for excessive vibration. After a few minutes, check the coupling temperature. If everything is normal, return the machine to service.
How to Choose the Right Replacement Spider
Not all spiders are the same. The material and hardness affect performance, temperature resistance, and chemical compatibility. Selecting the right spider is part of a reliable jaw coupling spider replacement.
Common Spider Materials
| Material | Hardness | Temperature Range | Best For |
|---|---|---|---|
| Natural Rubber | Medium | -40°C to 80°C | General machinery, low cost |
| Nitrile (NBR) | Medium | -30°C to 100°C | Oil and grease resistance |
| Polyurethane (PU) | High | -30°C to 90°C | Abrasion resistance, high torque |
| Hytrel | High | -40°C to 120°C | High temperature, chemical resistance |
| Bronze | Rigid | Very high temperature | High-heat environments, no damping |
Natural rubber offers good damping at low cost but degrades quickly with heat and oil. Nitrile resists oil and grease, making it common in industrial pump and compressor applications. Polyurethane handles higher torque and abrasion but has less vibration damping than rubber. Hytrel is a good choice when both temperature and chemical resistance are needed.
When to Upgrade the Material
If the original spider failed earlier than expected, consider upgrading the material. For example:
If the spider cracked from heat, switch to Hytrel or high-temperature polyurethane.
If the spider swelled or softened from oil exposure, switch to a nitrile or oil-resistant compound.
If the spider tore from shock loads, consider a softer compound with better damping or a larger coupling size.
At Hebei Suju, we can recommend the right spider material based on your operating temperature, torque, and environment. For specialized applications, we also offer drawing-based customization.
Installation and Alignment Best Practices
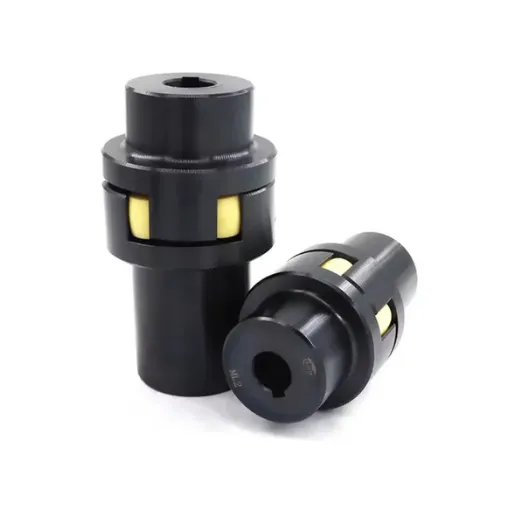
A new spider will not last if the coupling is installed incorrectly. These best practices help ensure a long service life after a jaw coupling spider replacement.
Maintain Proper Hub Gap
The hub gap is one of the most overlooked installation details. Jaw couplings need a small axial gap between the hubs so the spider can flex without being compressed. The exact value depends on the coupling size and manufacturer. Always follow the catalog value. Use a feeler gauge or caliper to verify the gap after installation.
Avoid Over-Tightening
Hub fasteners should be tightened to the manufacturer's torque value, not as tight as possible. Over-tightening can distort the hub bore, damage the shaft, or crack the spider. Under-tightening allows the hub to loosen and create impact loads. A torque wrench is essential.
Align Shafts Within Tolerance
Jaw couplings tolerate small amounts of angular and parallel misalignment, but operating near the limit increases spider wear. After installation, measure alignment and correct it if needed. Pay special attention to pipe strain on pump sets and belt tension on compressor drives. These external forces can push the shafts out of alignment even when the coupling itself is installed correctly.
Balance High-Speed Couplings
For couplings running above 3,000 RPM, dynamic balancing may be needed. An unbalanced coupling causes vibration that the spider cannot absorb. If the original coupling was balanced, mark the hub positions before disassembly and reinstall them in the same orientation.
Maintenance Tips to Extend Spider Life
Replacing a spider is not expensive, but unplanned downtime is. A simple inspection program can catch problems early and double or triple spider life.
Schedule Regular Inspections
Inspect the spider every three to six months depending on duty. Look for cracks, hardening, discoloration, and missing pieces. In severe applications, inspect more frequently. Keep records so you can predict replacement intervals and order spare parts in advance.
Monitor Vibration and Temperature
Trending vibration data is one of the best early warning systems. A gradual rise in vibration often indicates spider degradation before visible cracks appear. Temperature monitoring also helps. A hot coupling may mean the spider is rubbing or the hubs are misaligned.
Address Root Causes
If spiders fail repeatedly, do not just keep replacing them. Investigate the root cause. Common causes include:
Excessive misalignment
Overload or torque spikes
High operating temperature
Chemical exposure
Wrong spider material or size
Loose or damaged hubs
One chemical plant we supported was replacing spiders every two months on a cooling tower fan. The root cause was misalignment caused by a settling foundation. After correcting the alignment and adding a flexible mounting pad, the same spider lasted 11 months.
Keep Spare Spiders in Stock
For critical equipment, keep at least one spare spider on the shelf. Spiders are inexpensive and small. Having the right replacement available turns a potential multi-hour shutdown into a quick maintenance task.
Common Mistakes in Jaw Coupling Spider Replacement
Even experienced technicians make mistakes during spider replacement. Avoid these common errors:
Installing the wrong spider size: A spider that is too large or too small will not seat properly and will fail quickly.
Ignoring hub damage: Worn or cracked hubs destroy new spiders and can be dangerous at high speed.
Skipping alignment checks: Reusing old alignment without verification is a common cause of early failure.
Forcing the spider into place: A proper spider should fit by hand. Hammering it indicates a size mismatch or damaged jaws.
Overlooking the hub gap: Missing or incorrect gap causes spider compression and overheating.
Using the wrong material: A standard rubber spider in a hot or oily environment will fail prematurely.
External Standards and Resources
Coupling maintenance and selection are supported by industry standards. The American Gear Manufacturers Association (AGMA) publishes guidance on coupling service factors and ratings. The International Organization for Standardization (ISO) provides standards for mechanical vibration and rotating machinery alignment.
Following these standards helps ensure that your maintenance practices meet accepted engineering norms and that your replacement spiders are selected correctly.
Conclusion
A jaw coupling spider replacement is one of the simplest and most cost-effective maintenance tasks in a plant. Done correctly, it restores vibration damping, protects bearings and seals, and prevents unplanned downtime. The key is to select the right spider material, install it with the correct gap and torque, and verify shaft alignment before returning the machine to service.
If your team is seeing frequent spider failures, the spider is usually telling you something about the application. Check the alignment, temperature, and load conditions before installing the next replacement. Addressing the root cause will save far more time than repeated emergency repairs.
At Hebei Suju, we supply jaw couplings and replacement spiders for industrial drives. Our engineering team can help you choose the right spider material and size for your motor-pump sets, compressors, and general machinery.
Recently Posted
-
Flexible Coupling for Motor Pump Sets: A Selection Guide
July 28, 2026A maintenance manager at a water treatment plant in Southeast Asia called us after replacing motor pump couplings three times in 1 Read More
 -
Flexible Shaft Coupling: Selection Guide for Industrial Drives
July 28, 2026When two rotating shafts are connected directly, even a small amount of misalignment can generate vibration, bearing load, and pre Read More
 -
Elastic Coupling: Vibration Control for Industrial Drives
July 28, 2026When a motor-pump set starts vibrating above acceptable limits, the first checks usually fall on bearing wear, impeller balance, o Read More
 -
Bellows Coupling: Precision Guide for Servo Drives
July 28, 2026When a semiconductor packaging line suddenly loses position accuracy, the fault rarely starts at the servo motor. More often, the Read More

Contact Us

Recommended Products
-
 OEM Customizable Cardan Shaft Coupling Flexible Rigid Steel for Air Compressor Propeller Universal Construction Printing ShopsNegotiableMOQ: 2 Pieces
 -
Kc Coulpling Roller Chain Coupling Set With Chain and Sprocket for General MachineryNegotiableMOQ: 1 Piece
-
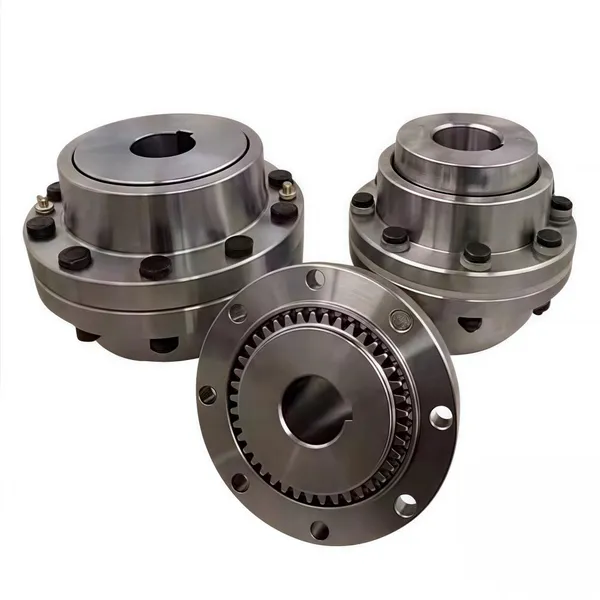
High Transmission Efficiency Drum Gear Coupling Easy Installation Gear Coupler For Heavy MachineryNegotiableMOQ: 10 Pieces
-
High-Torque Roller Chain Coupling Durable Steel Aluminium Construction Customizable Precision Engineering OEM Shaft CouplingsNegotiableMOQ: 2 Pieces
-
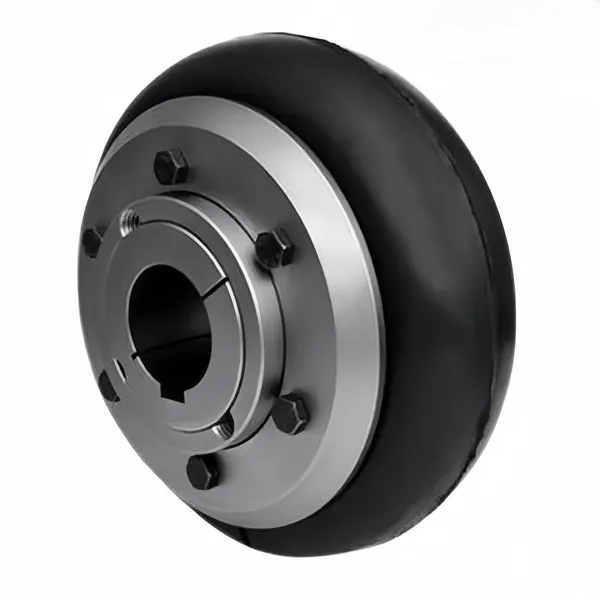
Customizable Rigid Iron Steel Aluminium Rubber Tyre Coupling OEM Support for Pumps Industrial Equipment Construction IndustriesNegotiableMOQ: 10 Pieces
-
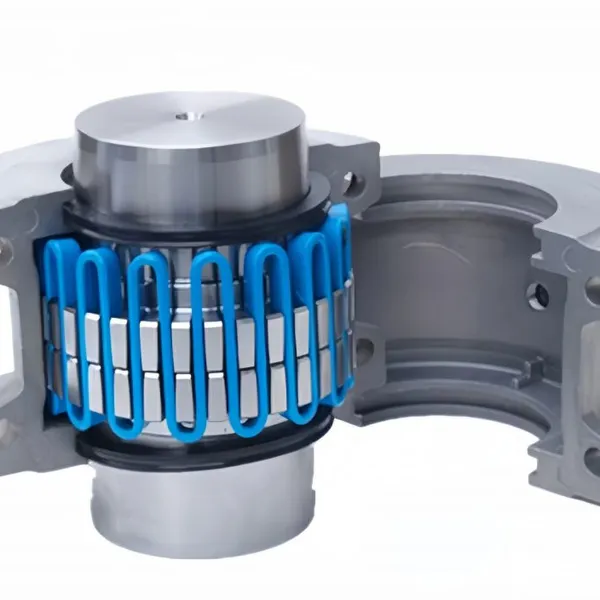
Jsb Flexible Grid Coupling With Metallic Elastic Element Factory Direct Spider Snake Spring CouplingNegotiableMOQ: 10 Pieces
-
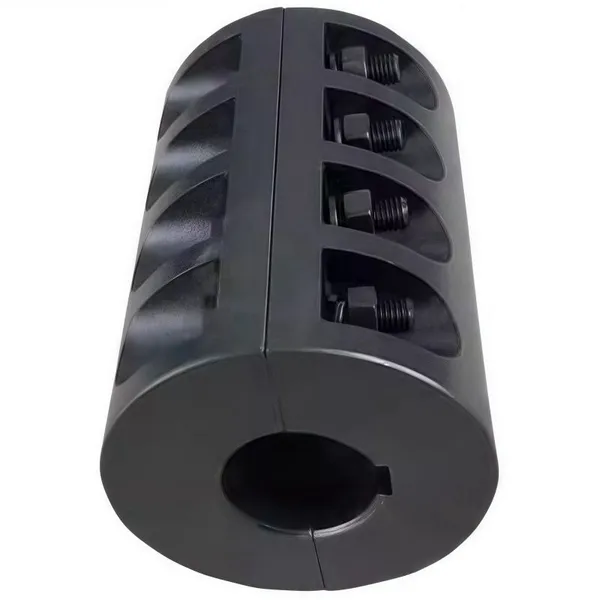
High Torque JQ/JQW Type Clamp Coupling for Motor & Gearbox 45 Steel Jacketed Iron Disc Structure Flexible Rigid OEM SupportedNegotiableMOQ: 2 Pieces
-
SWC Series Flange Universal Joint Coupling Hardened Cross Shaft Heavy Duty TransmissionNegotiableMOQ: 1 Piece
-
Heavy Duty Universal Coupling High Quality Universal Shaft for Machinery and EquipmentNegotiableMOQ: 1 Piece
-
OEM Customized Precision Cast Iron Zinc Aluminum Die Castings New Hydraulic Parts Fittings 1 Year WarrantyNegotiableMOQ: 100 Pieces
-
Yl Series Rigid Flange Coupling Power Transmission PartsNegotiableMOQ: 2 Pieces
-
Flange Coupling for Water Pump and Compressor Applications With Rubber Gasket SealNegotiableMOQ: 2 Pieces
-
Heavy-Duty Telescopic Welding Cardan Shaft for Universal UseNegotiableMOQ: 1 Piece
-
Flexible Universal Shaft Flange Coupling for Marine and Industrial Drive SystemsNegotiableMOQ: 10 Pieces
-
Durable Expansion Sleeve, Locking Assembly & Taper Lock Bushing for Robotic Arm JointsNegotiableMOQ: 1 Piece
-
High Quality Yl Type Rigid Flange Coupling Mechanical Transmission CouplingNegotiableMOQ: 2 Pieces
-
Stainless Steel Flexible Universal Joint Coupling for Motor Flange Gear Pump and Spline ShaftNegotiableMOQ: 1 Piece
-
Compact Drum Gear Coupling for Heavy Industrial Transmission High Torque CapacityNegotiableMOQ: 10 Pieces
-
Standard or Customized Jaw Beam (Helical) Flexible Coupling for General MachineryNegotiableMOQ: 10 Pieces
-
TL Series Elastic Pin Coupling Easy Replace Rubber Bush Coupling With Shaft Misalignment CompensationNegotiableMOQ: 10 Pieces